Saturday, October 1, 2011

Now We're Cooking

After a lot of consideration we opted to basically reframe the kitchen from the foundation up.  We had to reframe the back corner of the house anyhow.  There was heavy dry rot and insect damage in this back corner of the house, including two sides of the kitchen.  Two key reasons: Number one, at some point they installed a back patio which was higher than the sill plates on the abutting walls, with no expansion joint or treatment - it was basically sand and soil against untreated wood.  Not good.  Number two, and this is key, it's the roof stupid!  It's counter-intuitive, but if you have a rot problem at your sill (or anywhere for that matter), backtrack all the way to the roof.  In this case a moron installed gutters at some point and put a plastic mesh over the gutters to keep leaves out, and installed the mesh by nailing it into the roof and the metal valley where the kitchen el meets the main hose (center of picture).


One little nail hole three inches from the bottom edge of the valley, caused a little drip, drip, drip into the wall cavity, down the structural timbers, down to the foundation plate.  Soggy wood = rot = a juicy stew for termites and ants = THIS -------------------------->
In any case, there was a lot of damage, and prior modifications of the old framing.  Even where there were a few good studs, they were placed at irregular intervals - typically anywhere from 30" to 45" on center - so trying to frame for new windows and doors and cabinets where we needed was going to be basically impossible.  The greenish panel under the right side of the window in the below pictures is the remnant of a door.  At some point there was an exterior door there.  They basically cut away the top half, installed a double wide double hung window, and used the bottom half of the door as sheathing for the new shingles.  Resourceful. 


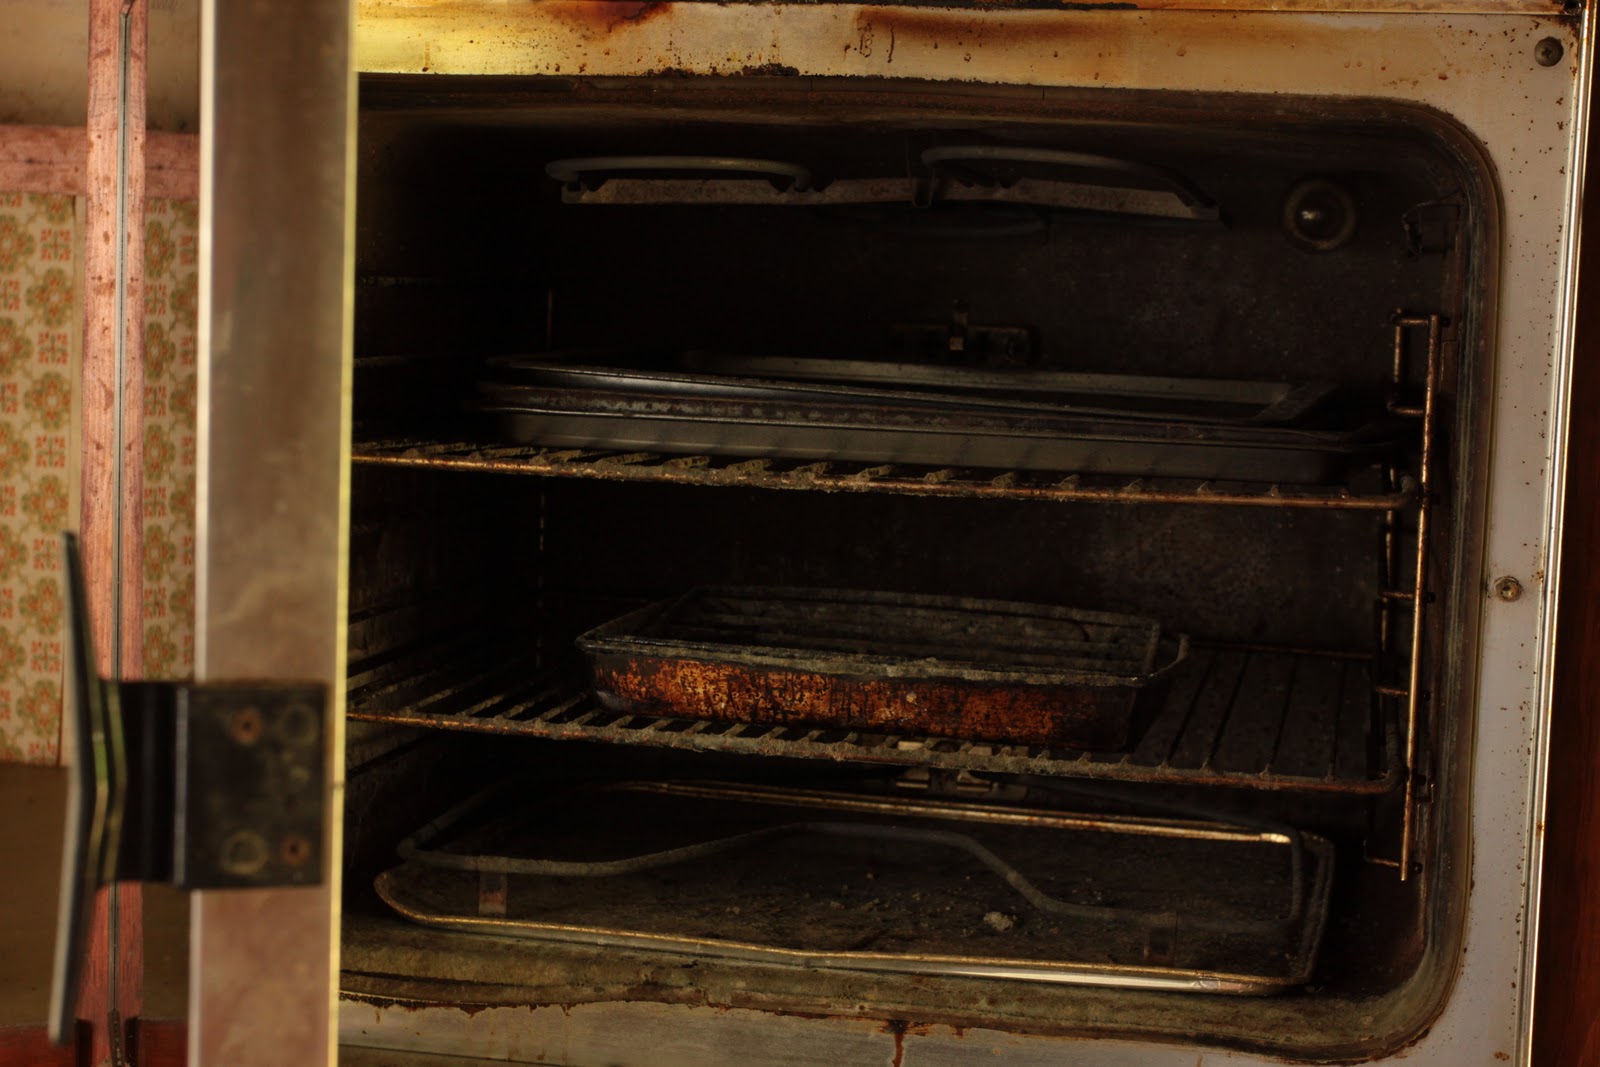
We saved the few timbers we could.  You can see the collar ties laying on the new crawl space floor.  These will go back up and be part of the structural framing.  The old dirt floor used to be about 10" below the sill plate.  There was no insulation and the floor was rotted and soft in many places.  And, it was pretty smelly.  The resident mice we're still sleeping in the oven insulation when we ripped it out of the wall.  They were startled.  So were we, although we shouldn't have been.

The new foundation was a major improvement.  We basically dug down below the frost line and poured an 8 -10" slab behind the existing stacked rubble walls so it locks in the existing foundation. Then we poured a "rat slab" on the floor to lock out the moisture and critters.  You will notice we also had to take down the fireplace in the kitchen.  We kept trying to take down one course at a time to get to a stable course to rebuild on, but each course was as loose as the next.  By the time we got to the firebox we knew we were beat - it was about an inch out of plumb from right to left, and the foundation simply wasn't solid enough to build off of.  I wasted a couple of days and a few hundred dollars trying to save what was there, but in the end we had to make the call for the sake of safety and soundness to take it all the way down and have it rebuilt.  I have a mason who has done these Rumford-style fireplaces in an old house restoration in Connecticut, so I'm excited to see him re-execute it.  We saved all the brick we could and will use it on the face inside, or the exterior portion, to ensure it looks "old" from outside.  We'll put back the iron pot hanger too.

This gable wall was funny.  It was literally
hanging from the rafters - you could lean on it and swing it back and forth over the foundation (the sill was totally gone.  There were no studs top to bottom which were complete and un-rotten.  And yet, we couldn't simply smash it apart.  Basically the exterior shingles were holding the whole dang thing together, so we sliced through them with a Sawzall in sections and tossed them in the dumpster.  Man triumphs. 
And when the weather turned crap AGAIN, we did the old hang a tarp routine, which NEVER works.  You just end up with holes and puddles in the tarp that pour down your neck at the most inopportune time.  We tried the yellow rubber suits too (mine was blue - ever the fashion plate), and that was just painful.  It was like being wrapped in cellophane and tossed in a steam room.  We decided to be wet and cold and comfortable instead.  Thank goodness the weathermen were wrong yet again, and the sun came out about an hour later.


The toughest part about this wasn't the demo or the framing...it was the measuring.  Ultimately we had to work with what was there in terms of a footprint and the existing roof we're keeping, but of course nothing was perfectly aligned.  It's not such a big deal if you know you have one straight wall to work off of, but which one to choose as our "base" wall to strike 3-4-5 triangles off of?  In the end, we did the best we could and it all fell within generally a 1/2" - 3/4" of plumb and square, which isn't so bad.  Once we straightened the top plates on the roof, the whole roof line fell in line and looks stable and true now, which is exciting.  I remember the first fussy engineer I had look at the house who almost lost his breakfast over the wobbly roof line.  He approached the house, gave it a once over, looked at the roof, and exclaimed in his frenchie accent - "eet is a gut reno'..."  My real estate agent had sized him up a few minutes earlier when he refused to step in snow to get to the back door.  In any case, I digress. 

With the demo done and the lines struck, we quickly knocked out the new framing.  We used 6x6 treated timbers for the new sills - I figured we'd keep it as close to the original timber dimensions and framing style as we could.  With the sill and top plates laid out, we went to town.  We realized a 1 1/2" height screw up once we had the first wall up, we simply cut the nails securing the bottom plate to the 6x6, jacked it up,and put another 2x4 under it.  Presto!  Tinker Toys are so much fun.  My nephews were so amazed how you can lift a wall with a couple of car jacks and basically hold up a whole house temporarily with a couple of 4x4's.  I fear a stupid frat house prank at some point...


And then the sheathing.  Progress again!!!!


The waning daylight, and me being drenched to the core from earlier rain, eventually won out at the end of the day.  But the progress was solid, and the gods were pleased.


Wednesday, September 28, 2011

Kitchen Nightmares

Sorry it's been so long folks!  Had an unfortunate event with cameras and had to recover pictures (since I learned y'all really like the pics more than my writing. Very sad.) Time to catch up, in an episode I'll call... 


This is the Kitchen el, off the back of the house.  They say this was originally a "summer kitchen," which would have been a separate structure from the main house where the "women folk" would cook and clean in the summer months.  Since cooking was done in an open fireplace, cooking in the main house in the summer months would have been brutally hot.  Apparently it was ok to relegate the women in neck-to-toe garments and bonnets to the summer kitchen to slave over the flames.   There was a fireplace on the back gable end and the chimney used to come through the roof to the left of the window.  The window was not original.


If the kitchen was a separate structure at one point, it's not clear how it was separate from the main house...it would have been very close...within feet, which doesn't seem likely.  In any case, it seems clear that the kitchen wing - whether a separate structure or an addition - was built later than the main house.  It still uses timber frame construction methods such as hand-hewn timbers and mortise and tenon joints, but the timbers are a smaller dimension, and the pegged joints a bit different. 

View into kitchen from side Dutch Door

Fireplace at the gable end
Think of the delicious, homey meals that came out of this kitchen..once from the ancient hearth, and more recently from this modern electric double wall oven replete with modern features like an interior light and analog clock!

Hey Mom, what's for dinner?!?

We popped up the ceiling boards and saved them.  Conceptually they cover the same footprint as the floor, so maybe we'll re-use them as the floor boards in the new kitchen.  The collar tie cross beams are beautiful old timbers.  But, they stood at about six and a half feet off the floor.  Even with the ceiling boards out, the height still made it feel a little claustrophobic...or, along with all the odors in the kitchen, like a chicken coop.  So, we popped out the wooden pegs holding them in place and set them aside for now.  When the kitchen is re-framed, we will re-install them on the top of the side wall top plates, which will gain us another foot of headroom, but still leverage these timbers for structural support.  I was torn whether to take them out and move the timbers higher, or possibly drop the floor 8" to gain more headroom.  Although the mortise and tenon joints between the top of the wall studs and the collar ties were generally still in place, over half of the studs had been cut off to accommodate newer windows and the door, and for repair reasons.  So, there wasn't much to save, and there would have been a lot more repair work given the condition of the exterior walls.  The roof rafters are basically small tree trunks about 4" in diameter.  The horizontal furring strips were added when the latest cedar roof was installed, which was probably 25-30 years ago.


These two pictures show the view looking back into the great room, and then beyond the great room to the front foyer and front door.  In the top picture on the far left you can see a door which led to a steep primitive staircase that went up to the attic above the kitchen.  We really liked the quaintness of that staircase and wanted to keep it, but it would have been a staircase to no-where and cut into the floor space.  We did, of course, save the stairs in-tact and all the cupboard doors and trim.  I hope to re-use the doors and trim somewhere in the kitchen, and if possible use the stairs in the library, even if for decoration.

We will widen this doorway leading to the great room to about five feet, so the whole space will feel more connected and cohesive, and the rooms will flow better.  The kitchen is about 16"x16", which is a decent size, but not super huge for gathering...and our families do a lot of kitchen gathering.  By opening up the door and joining the kitchen to the family/dining room, I think the whole back of the house will basically be a gathering space, which should be awesome.


And what would an old kitchen, that was last updated in the early 1900's, be without a bottle opener....no expense was spared to outfit this place with the sleekest modern kitchen marvels.  You can barely make it out, but the words "bottle opener" are stamped on the top of the fixture.  Think of it: this was such an innovation at one time that they actually had to to label it with a descriptive tag.  Actually, I bet most of my nieces and nephews would need the written cue to figure out what this is.  (And, is it me, or does it look like this dang thing is laughing at me...what does he know?)


Wednesday, June 29, 2011

Back in TIme


A lot of folks have asked for more pictures, especially of the outside of the house "before."  So, here goes:

Front from Street


Back Doors, Kitchen on Right

Back View

Side View
Back with Shed (the original outhouse)

Garage and Garage Shed (dated 1901)

Library

Library


Great Room

Upstairs Hall

Bedroom First Floor


House Across Street

Sunday, June 26, 2011

Bit by Bit, Stone by Stone


Thanks a million to all of you who have sent me notes of encouragement!  I think everyone has included a comment to the effect of "wow, that's a big project."  Well, yes.  And on Friday the project got the best of me.  I was duly daunted.  The mason stopped by and had a bit of a different idea of how to tackle the foundation.  We talked it r=through for a while and settled on a combination of what he was talking about and what Anderson and I had talked about. He prefers, of course, to come once and do it all, which would mean opening all the sides of the house and potentially supporting pretty much the whole house on temporary posts, which I am not comfortable doing.  He also said he'd need to push off starting until the week after July 4, since it was a bigger project than we initially thought and he has work he needs to complete before the 4th.

This all left me somewhat paralyzed - I couldn't decide whether to continue to expose more of the house, take up the rest of the floor in the first story bedroom, concentrate on a different project...go to the beach.  I eventually decided to just keep going on the floor, and take it all up in the first bedroom, essentially exposing a quarter of the house crawl space, sill, and foundation.  I was shocked to find that the floor joists - all original timbers - were in very good and basically sound condition.  We saved all the floor boards and framing structures, numbering each piece (duck tape on the right-hand side)

This picture, with Matt at the window, gives a good perspective on how the floor joist and support system was constructed.  Each of the small slats has hand-cut tenons on each end which fit into hand-cut mortises on the joists.

.

On Saturday we were again at a standstill in terms of whether to keep going on the next front room - the library - given how good the bedroom joists looked, and that the sill and corner post on that side seemed to be in very good condition.  The question in my mind was, if we took everything up across the front of the house, then were we prepared to do the same across the back of the house.  And if we weren't prepared to re-do the whole back side of the house, then why were we bothering to do the whole front side.  We decided it was all dependent on how stable or how bad the back of the house foundation and floor framing was.  The foundation seemed like it was in better shape from the outside, and from the access hole in the living room it looked as if all the joists had been reframed with dimensional lumber and the old floor sat on a layer of 3/4" plywood and was very sound.  But, who knew.  There was only one way to tell.  So, down I went into the access hole and into the 18" high crawl space.  Someone had to do it; Im not sure why one of my twenty-something nephews didn't draw the short straw, but oh well. Of course, they had a grand time seeing me go at it.


Good news - the foundation on the back side of the house has already been re-poured behind the exterior granite blocks.  This is exactly the treatment the mason was suggesting.  And, all the joist framing has ben re-done and appears rot and pest free.  The only issue is the plastic liner on the crawl space floor and the crumbling insulation hanging from the joists and sitting on the ground.  That's made the crawl space pretty dank and musty, and I suspect home for little furry friends over the years.  That all needs to come out.  Someone else's turn next time, though!

Friday, June 24, 2011

Timber Frame v. Post and Beam


Credit: Maine Barn Company
I woke up today thinking to my self "just how structural is the foundation in a timber frame building?"  I know, deep thought.  The point is, where is the true load in a timber frame structure.  There are obviously loads on all the beams and obviously the structure needs a foundation.  However, in present day "stick" or platform framing, exterior walls are all structural and all carry a load down to the foundation, which in turn is intended to be able to carry a uniform load at every point.  In timber framing, it seems to me, the true load is at the vertical posts, like the corners.  See in this picture as an example, the structure is supported at the corner posts; the exterior walls don't require structural stud walls for support.  (And the diagonal cross members eliminate the need for plywood sheathing to create rack strength.)  In the case of the 168 Strongs (our house), we have vertical members at the corner posts and the mid-point of the gable wall, like in this diagram. 

I haven't figured out the load on the front and back walls yet.  If it stops raining, that will be today's mind bender.  All this to say Anderson is probably right - the corner blocks are the key foundation points.  The side foundation between vertical posts conceptually really only needs to carry the load of the sill plate to support the first floor floor joists - a much smaller load.  But, given the age and the apparent "all you can eat salad bar" that must've been somewhere for our cellulose-chomping friends, putting in extra structure and creating supporting stud walls is not a bad idea. 

By the way, I was also curious about the difference between "timber frame" and "post and beam" construction.  The (online) consensus is that timber frame construction refers to solid wood timbers typically connected in mortise and tenon joints secured by wooden pegs, and post and beam refers to heavy wooden timber construction where steel plates or gussets are used to secure joints.  What we commonly refer to as "Tudor Style" was actually timber frame construction and sometimes referred to as "half timber," because the faces of the timbers were left exposed externally and sometimes internally (assuming the "timbers" aren't just thin trim applied for show).

Thursday, June 23, 2011

I Built my House of Brick


We started stripping siding and exposing the sills and corner members to get a bead on what we're dealing with.  This is the worst corner of the house (leaving aside the kitchen which is literally flopping in the wind).  We started with the front half of the East gable side, exposing what was left of the sill and the foundation.  We have the corner and the second floor header and the diagonal cross beam supported with 4x4s.  


The issue now is what to do with the foundation.  I was initially happy that what people refer to as a "stacked rubble" foundation in our case is fairly substantial-sized blocks of granite which seemed to be tightly fitted, as you can see across the front of the house. 


I had hoped to repoint the blocks and move forward.  But, after exposing the blocks completely, it's apparent the facing side of the blocks are smooth and tightly fitted, but the interior side of the blocks are all sorts of uneven and irregular, with large gaps between the blocks.  It's hard to imagine how these could be re-set, let alone repointed, to be sufficiently "structural."  But, then again, it's been here nearly 225 years and the house hasn't seemed to have suffered from much settling along the perimeter.


Our friend Anderson, who is an architect, was kind enough to walk me through some alternatives, pointing out that the corner blocks and mid-point of the walls may have been more structurally significant, and the foundation blocks between these points placed later on to create a solid-looking foundation.   This makes a lot of sense, especially because the top of the foundation walls, surprisingly, are not flat, but slope down away from the face 10-15 degrees or more, and so wouldn't provide a solid plane of support even if they were re-set.  Maybe there was mortar on top which has deteriorated, or maybe the tapered tops made it a lot easier to set the blocks when creating the flat face.  Maybe both.  In any case, we both agree the right approach is to probably dig footings and build block piers about every 8 feet to create a sustainable foundation. Anderson even drew me an unofficial detail.  Now it's just a matter of getting motivated to go dig after a big breakfast at The Hampton Maid!  

Thank goodness it just started to rain again...saved by the weather.  I've also loaded a couple of pictures of the floor construction detail because I was going on and on yesterday like a little kid because I was so blown away by the joining detail.  Every joint in the house is mortise and tenon construction, tightly fit by hand, piece by piece.  The major joints of the framing use a wooden peg to hold the timbers together, but lesser joints like these in the floor joist are hand fit and still snug after 200 years.  Amazing.  The larger timbers running left to right in the top photo are the floor joists and are the original tree trunk timbers (with bark generally still intact), hand flattened on the top side, and narrowed to a square tenon on the end, which then fit into a hand-cut mortise in the sill.  The wall studs likewise were squared to a tenon and fit into a mortise in the sill.  Each one, one-by-one, with hand tools.  The boards running top to bottom in the picture are each individual cripple joists about an inch thick which have been fit mortise and tenon into the top of the floor joists and support the floor planks between each joist.  The large piece of wood at the right-hand side is the underside of a floor plank we took up to get access to the interior of the foundation blocks.  The picture at the bottom shows one of these cripple joists (as I am calling them) and the mortise and tenon in a little more detail.  To put into perspective how tight the joints still were, I had to tap most of them on the bottom with my 20oz framing hammer to loosen them enough to get them out.  Then we numbered each one based on the joist front-to-back (1, 2, 3) and the cripple row side-to-side (A, B, C), so we can re-assemble later.  When we're done, chances are I will lay down plywood first, and then put the original planks back down on top, so these cripple joists won't be needed, but I feel obligated to replace them all from where they came in proper order, because they are part of the house's body, and the body is the temple of soul, no?.  And, perhaps in another 200 years someone else will have the thrill to re-discover them and marvel as much as I am.  Call me strange.